
☕🤖 Tutorial: 3 Insane Use Cases for AI Image Generation with Nano Banana
PLUS: Prompts and examples inside...


Hey AI Break fam 👋 Luis & Rui here!
Ever wished AI could take your product photos or model shots to the next level, without hours in Photoshop?
Good news: with Gemini’s Flash 2.5 image model (aka “Nano Banana”), you can.
Today’s tutorial shows you how to:
Recreate backgrounds with a reference image
Place products naturally into hands
Add or swap clothes on models & avatars
It’s fast, flexible, and seriously powerful for creators and marketers.
Let’s dive in.

1) Set up the model (2 minutes)
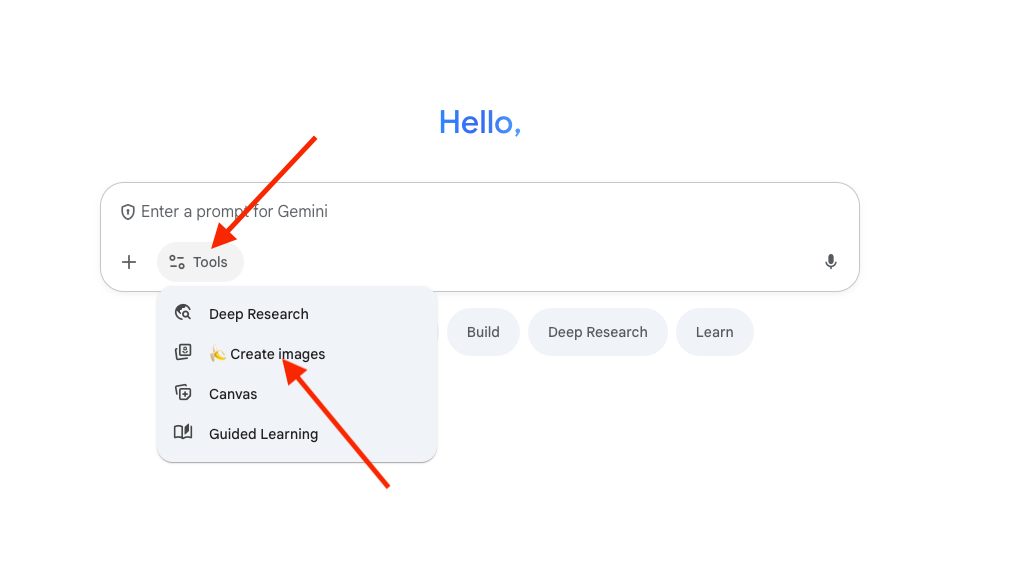
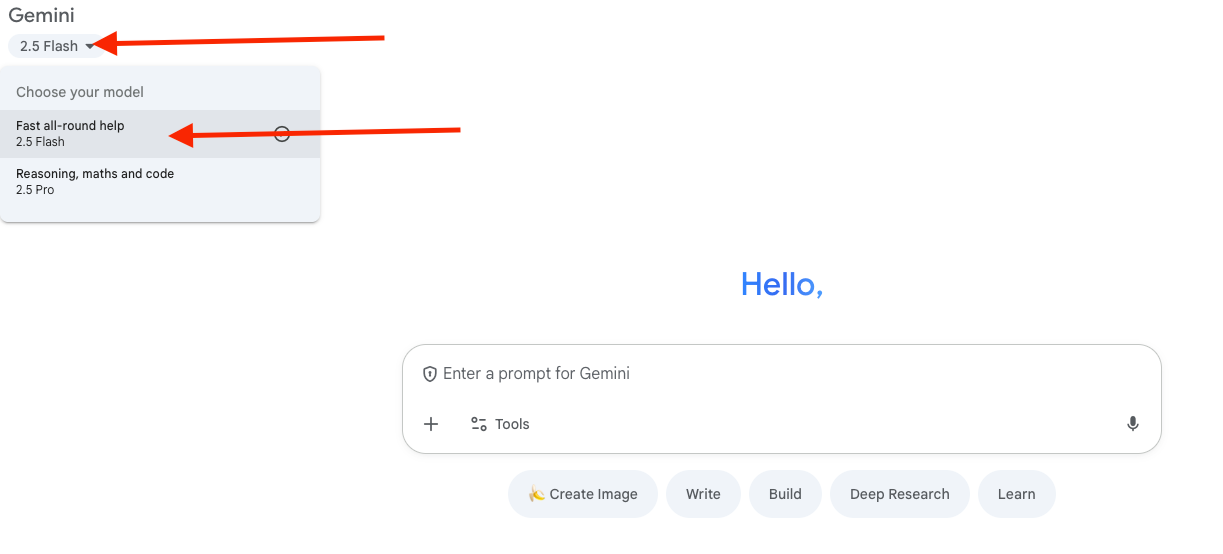
Open Google Gemini (latest version).
Switch to the Flash 2.5 model.

Go to tools and select “Create images”
Free tier works for light tests (uploads + generations are limited). For heavier use, upgrade to Pro.

Tip: Keep a new chat per project. It makes iterative edits (“move the watch higher”, “keep size the same”) far more reliable.
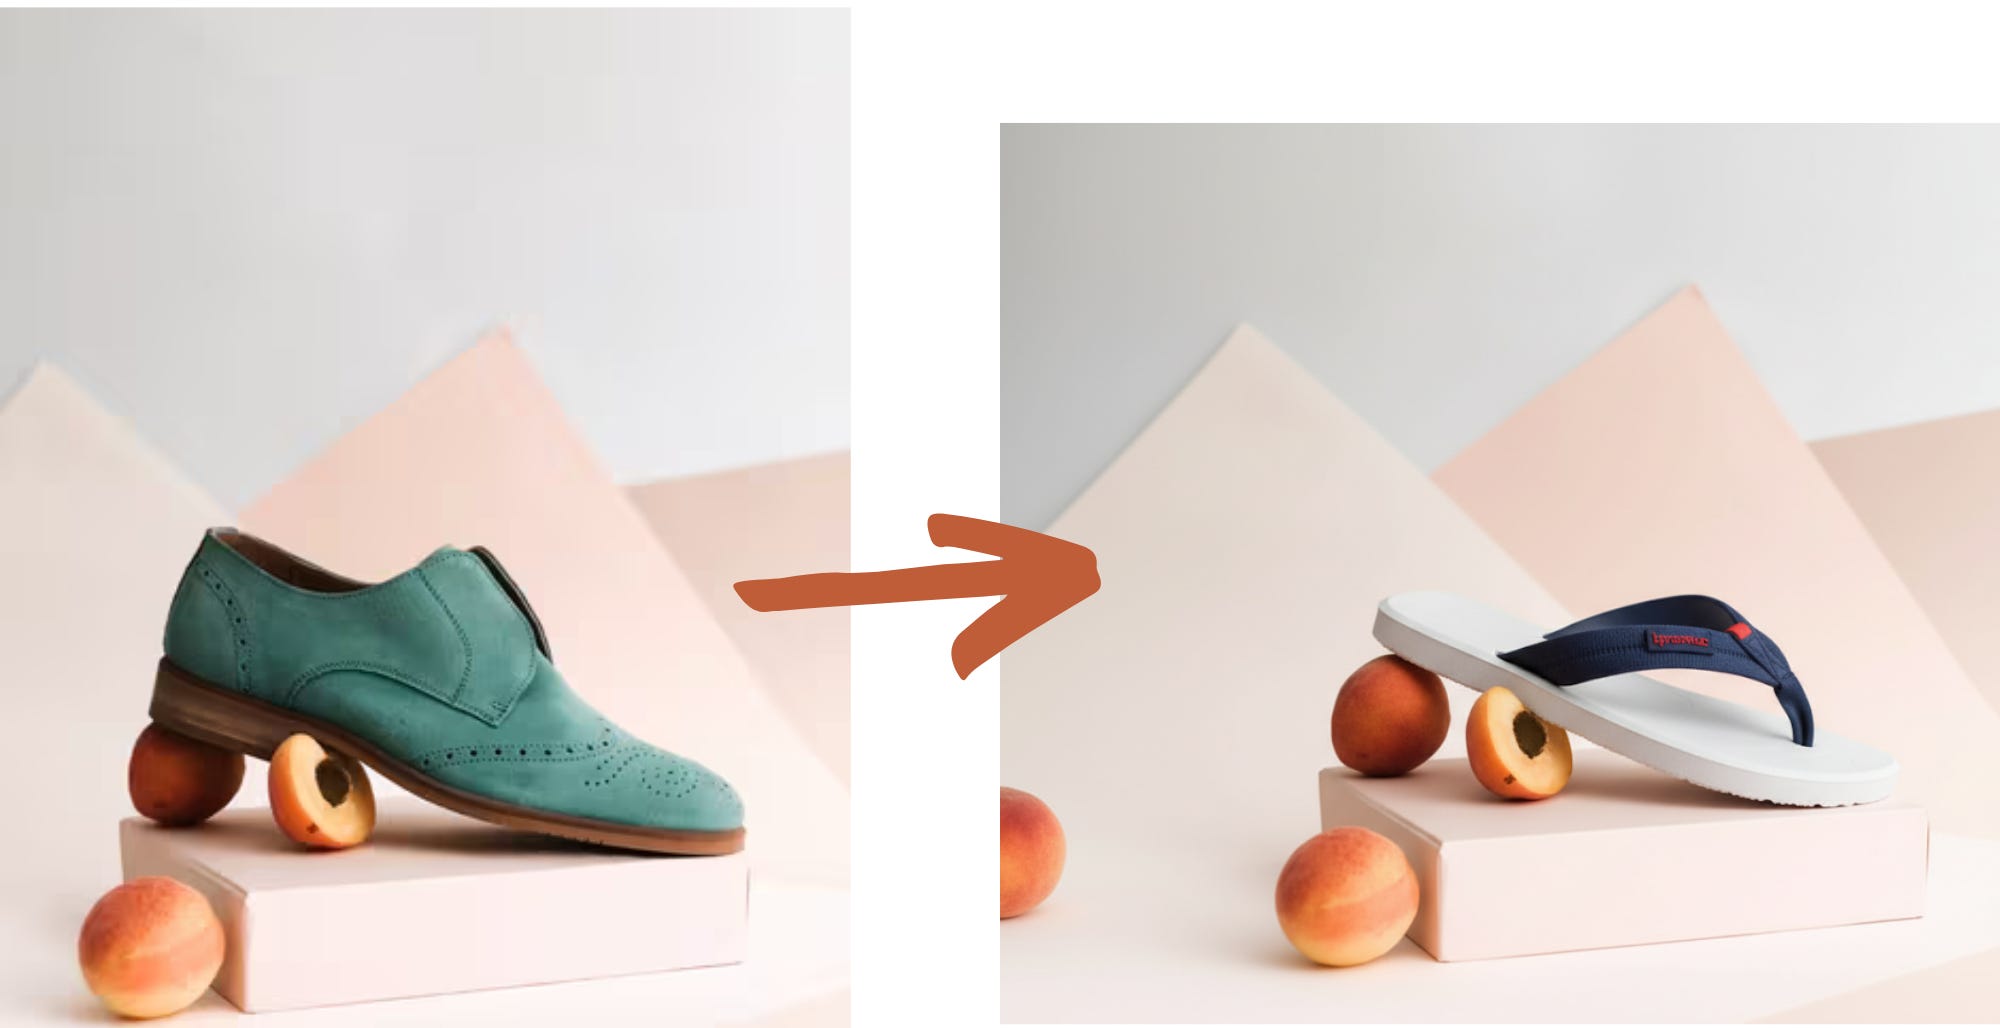
2) Technique #1 — Background Control with a Reference Image
Use when: You want a specific mood/look (lighting, color, environment), and you’ll composite an object into it (e.g., a watch, shoe, bottle).
Steps
Upload a background reference image (the vibe you want).
Upload your subject photo (e.g., a watch on white).
Paste the prompt below, then generate.
Prompt (copy & adapt):
You are a commercial art director. Recreate the mood, colors, and composition style of the uploaded REFERENCE_IMAGE.

Composite the uploaded SUBJECT_IMAGE into the scene so it feels naturally integrated.

Details:
- Product placement: [describe where you want it → e.g., “center of frame, slightly floating above the surface”]
- Lighting: [describe your light → e.g., “soft sunset glow from the left, rim light from behind”]
- Atmosphere: [add vibe → e.g., “hazy, cinematic, warm tones”]

Constraints:
- Keep the SUBJECT the same size as uploaded
- Preserve reflections, materials, and sharp details

Deliver 3 variations with different shot angles.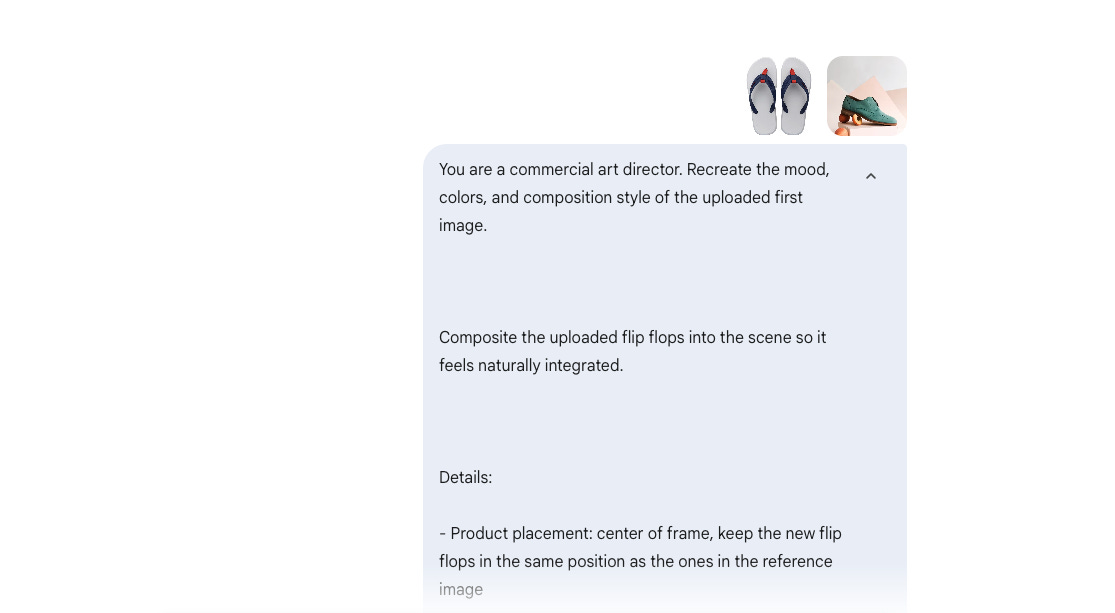
Result:
Iterating like a pro
“Raise the product higher, keep size unchanged.”
“Reduce glow on the rim light by 20%.”
“Add slightly warmer key light from the left.”
“Increase depth haze behind subject for separation.”
Troubleshooting
If the model resizes the object when you ask to move it, add:
“Do not change product scale. Only adjust vertical position.”If dust/smoke overpowers the subject, specify:
“Dust opacity under 15%, detail focused on product.”
3) Technique #2 — Realistic “Hand + Product” Shots
Use when: You want believable hand poses, correct grip, and matching light, classic ad look.
Steps
Upload the product image (transparent PNG if available helps).
If you want a scene (e.g., rainforest), describe it clearly.
Use camera/lens cues to anchor realism.
Prompt (copy & adapt):